Quick Start
1. System Requirements
Recommended hardware configuration
- x86 64bit, 4 cores
- 16 GB RAM
- SSD with at least 10G free space (pending in the database)
Supported Operating Systems
- Linux (support for popular distributions, tested with Debian and Ubuntu)
- Windows 10/11
- Windows Server 2019/2022
Supported Browsers
- Google Chrome (Latest Version)
- Microsoft Edge (Latest Version)
2. Download installation package
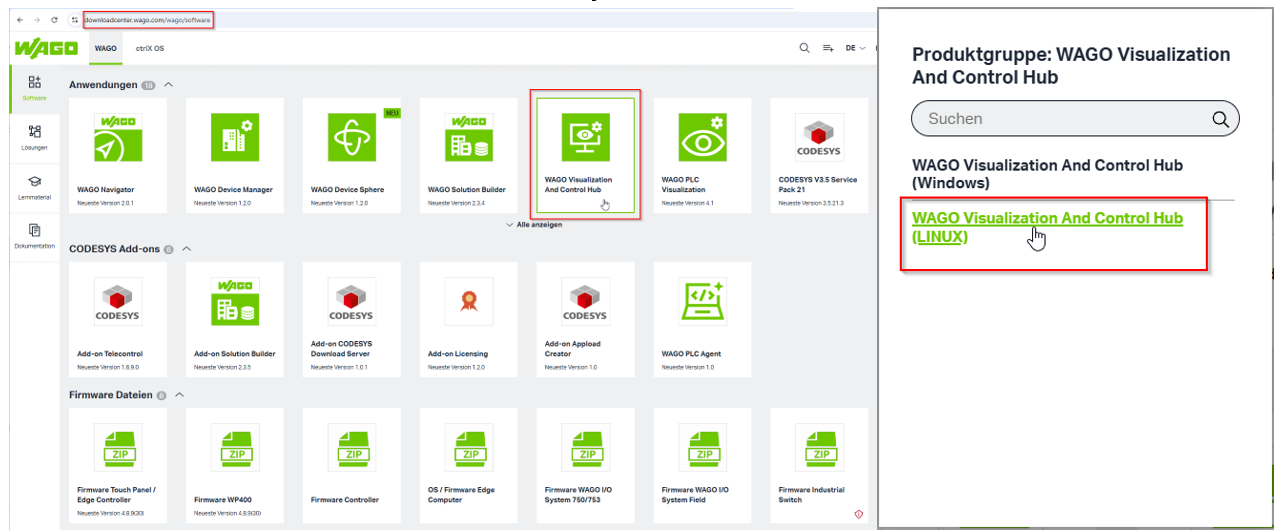
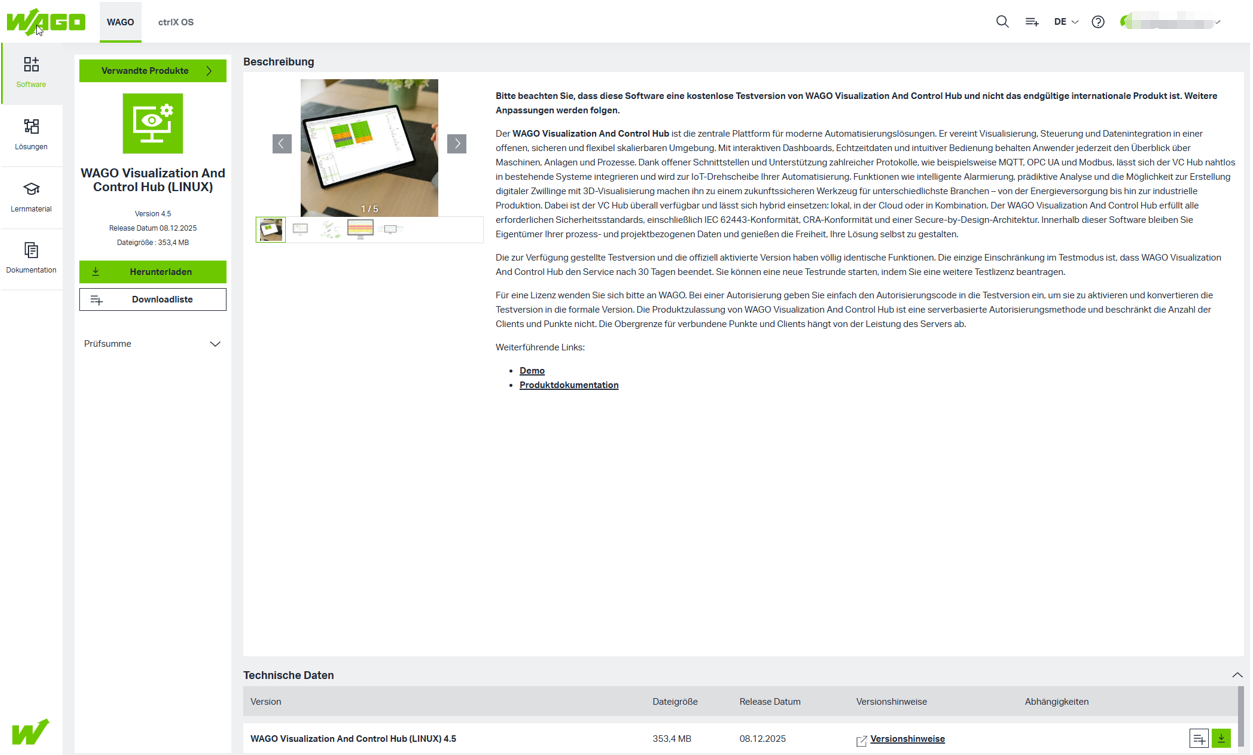
Download the latest VC Hub version from the WAGO Download Center.
https://downloadcenter.wago.com/wago/software
There are two versions available for download: Linux and Windows.
You can download whichever one suits your actual needs.
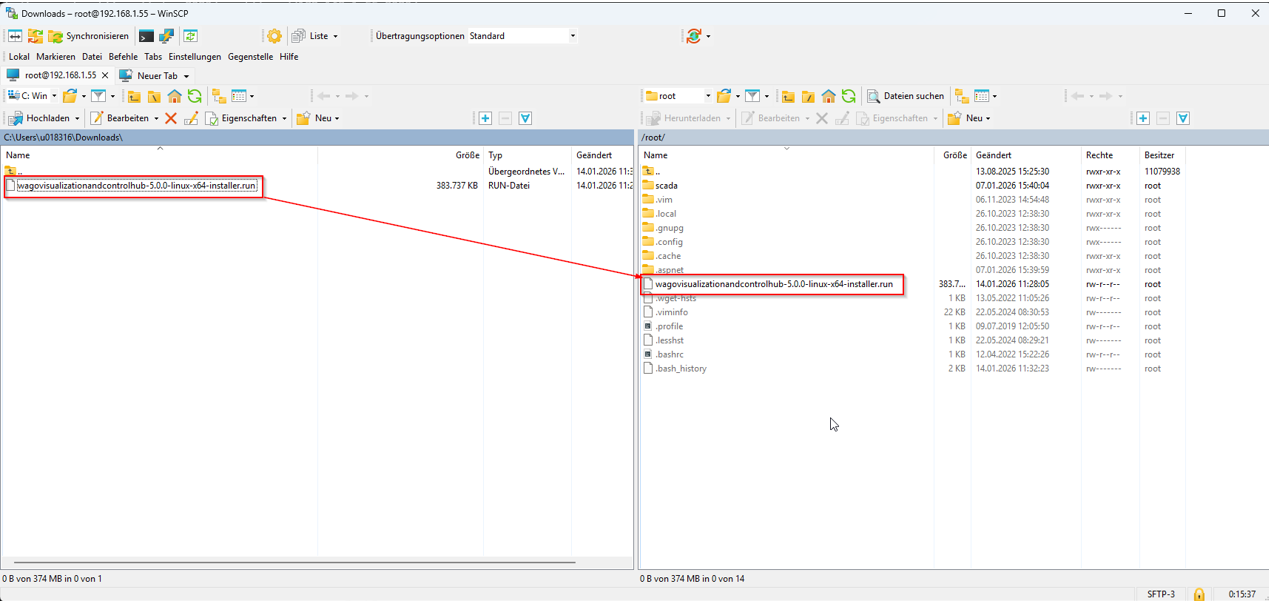
Upload the installer package to the desired computer.
The easiest way is to use a file transfer tool such as WinSCP or FileZilla.
Be ensured before installation:
-
The device must be accessible to the operator / administrator on the network. At the latest when the application has been installed on the target system, all further steps are carried out via the VC Hub web interface.
-
To install the VC Hub, the technician requires administrative rights, meaning they must be a member of the root / sudo group on the target system.
-
The target computer requires access to the Internet, as any packages that are not available during installation will be installed automatically. Access to the Internet is also required after installation for licensing the system with the Wago registration server. After that, Internet access is no longer necessary.
3. Install VC hub
3.1 Windows Environment
Recommended Systems
- Windows Server 2012 R2
- Windows Server 2016
- Windows Server 2019
- Windows Server 2022
- Windows 10 (Not supported in Home Edition)
- Windows 11 (Not supported in Home Edition)
Installation Steps
-
Run the installation package program as an administrator.
-
Select the installation language.
-
Perform a port check, if the port is occupied, the installation cannot proceed.
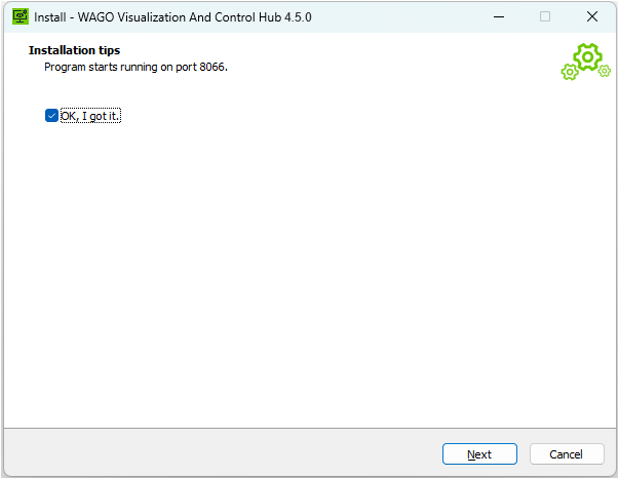
-
Read and accept the license agreement.
-
Choose the installation location.
-
Select the VC Hub application data directory.
-
The installation process will take a few minutes.
-
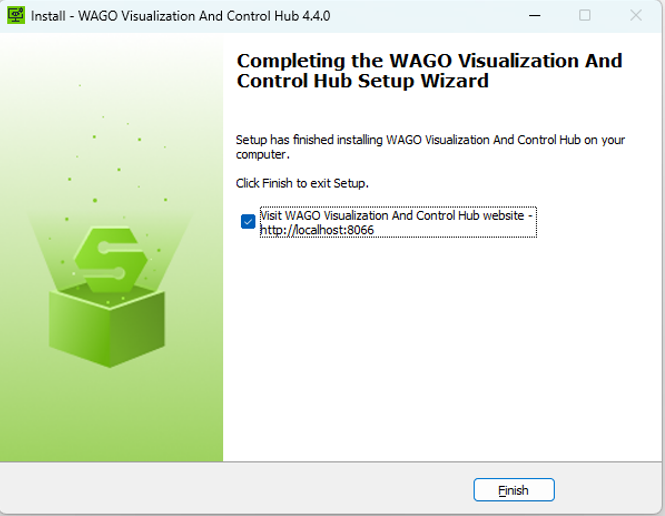
The installation is complete. Check the Checkbox as shown in the picture below, then click "Finish”.
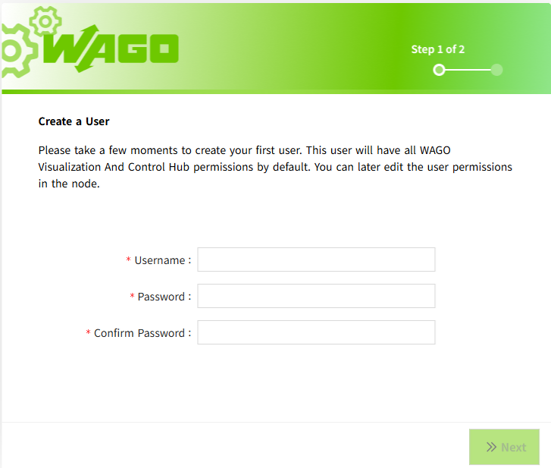
- You will enter the process of creating the user interface. Create an administrator user. Remember this username and password, as you will use them to log in for the first time.
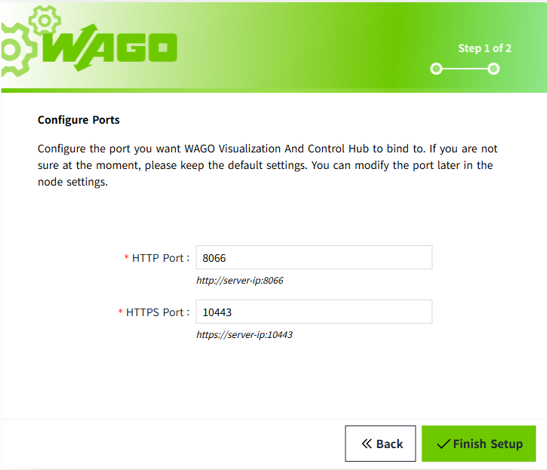
- Port configuration.The VC Hub suggests ports 8066 and 10443 for the web interface.
- After completing the above steps, wait for the program to load, and then you can log in to the default-created workspace with the user created in step 1.
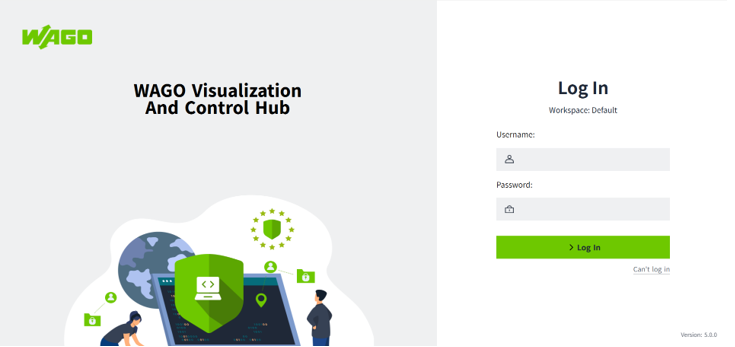
Notes:
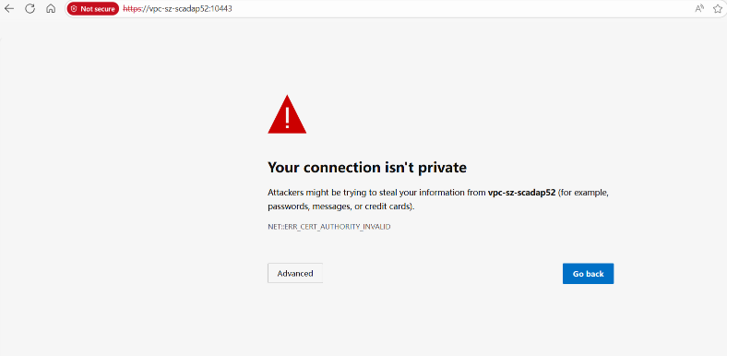
With https, only a self-signed certificate is currently available, which is why a security message appears in the browser. This can be adjusted later. It will not affect the current use of the system.
The IP address is based on the actual deployment address you have chosen. The following image is merely for illustration purposes.
3.2 Linux Environment
Installation Steps
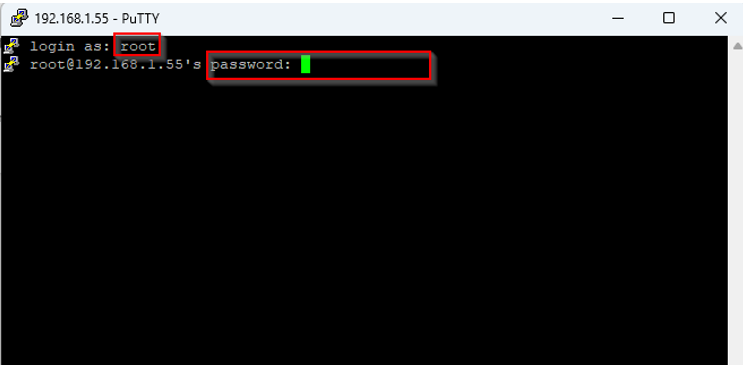
- To perform the installation, you need a Terminal (SSH) connection to the target server. You can log in using a connected display and keyboard, or connect remotely using any SSH tool. e.g.
ssh [email protected](Server IP or Hostname)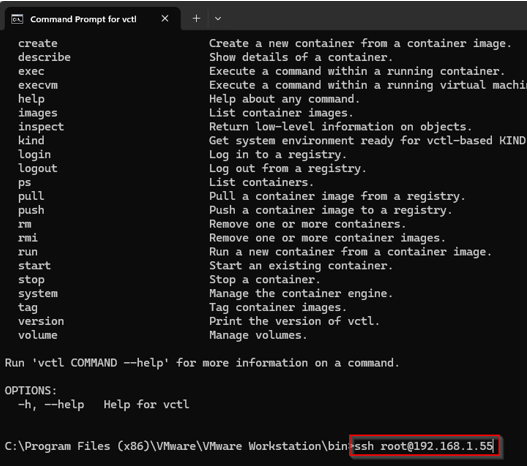
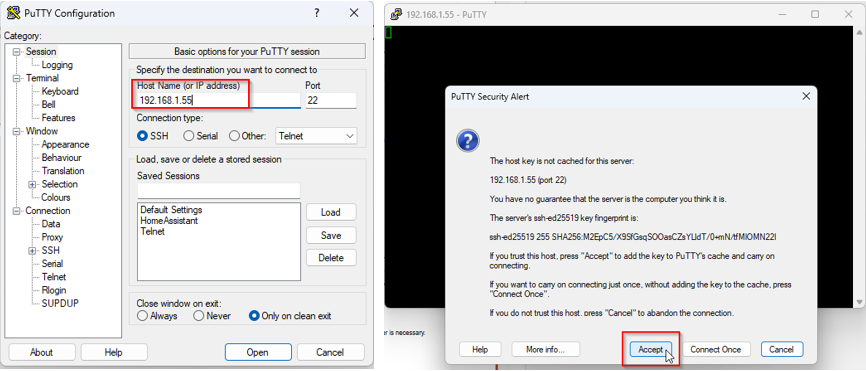
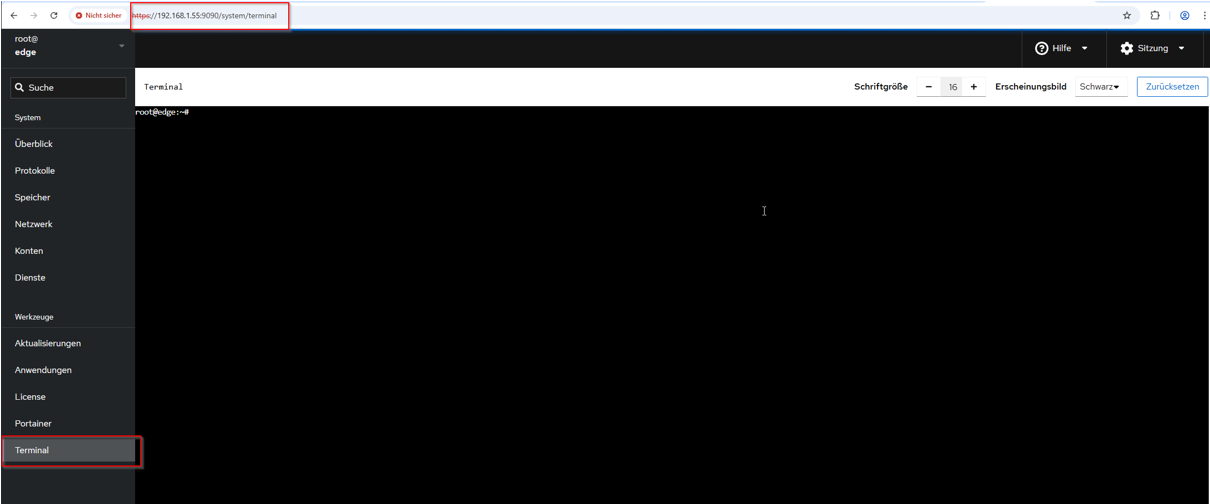
- For a WAGO Edge Computer server that has a preinstalled operating system, the terminal is also accessible via the web interface.
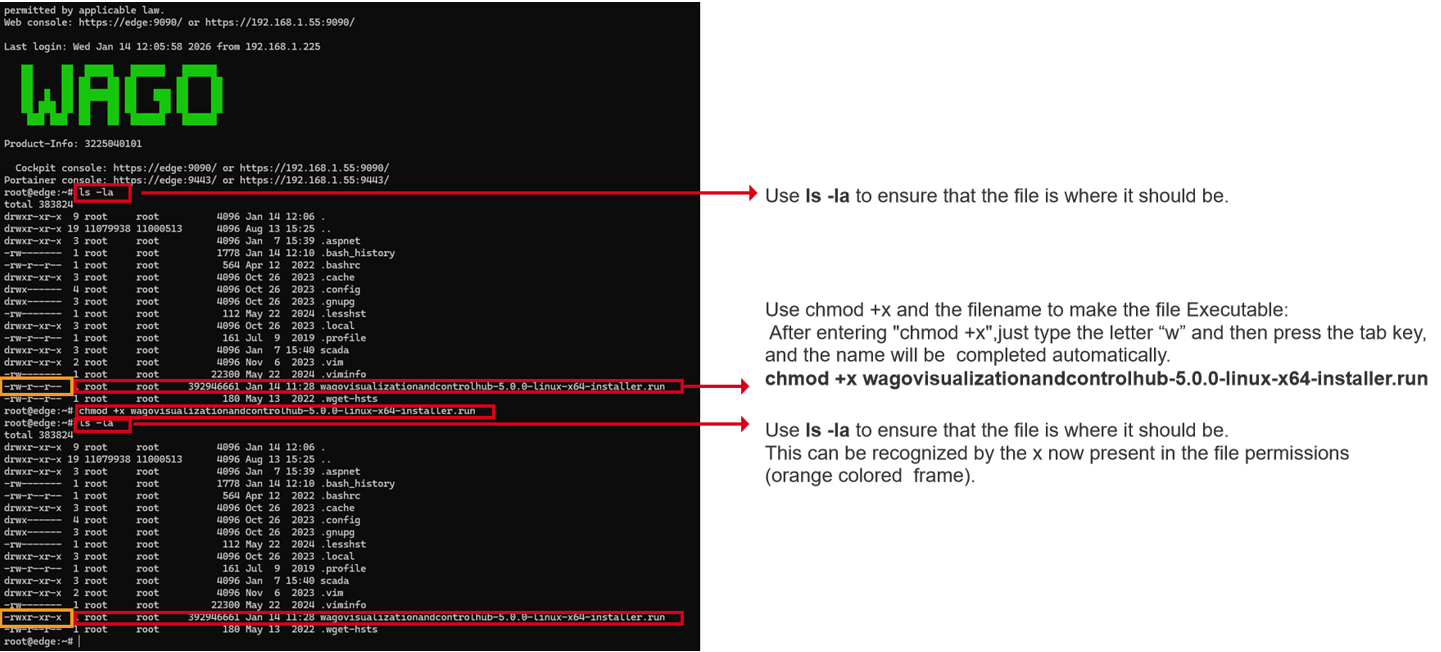
- The user performing the installation requires root privileges on the system
- Install the installation package
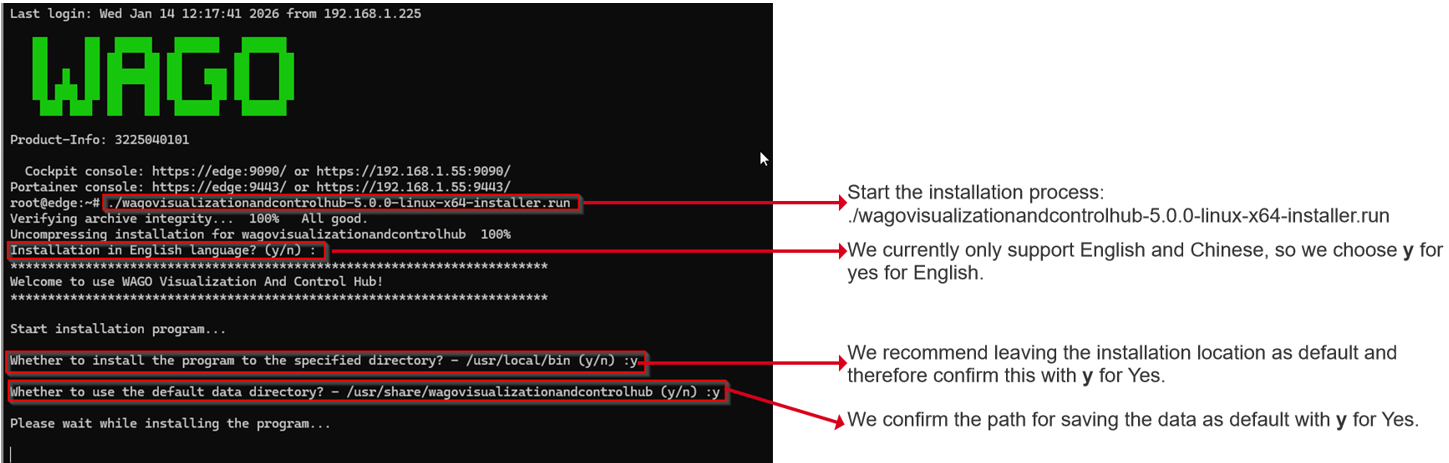
- The installation should be complete after a few minutes. The next steps are taken in the web browser.( The information about the local host is not entirely correct, as the VC Hub can now also be accessed via the configured IP address or the assigned domain name.)
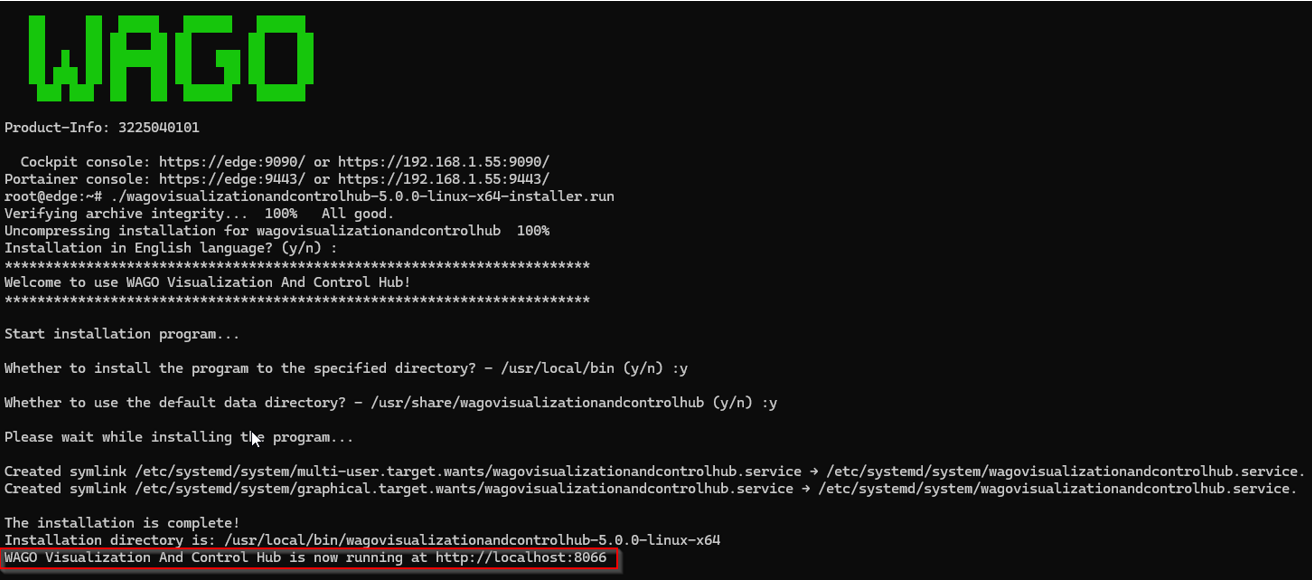
- Open the URL 192.168.1.55:55:8066, where the address 192.168.1.55 is used here as an example. Use the IP address or domain name you have assigned. Port 8066 must also be specified.
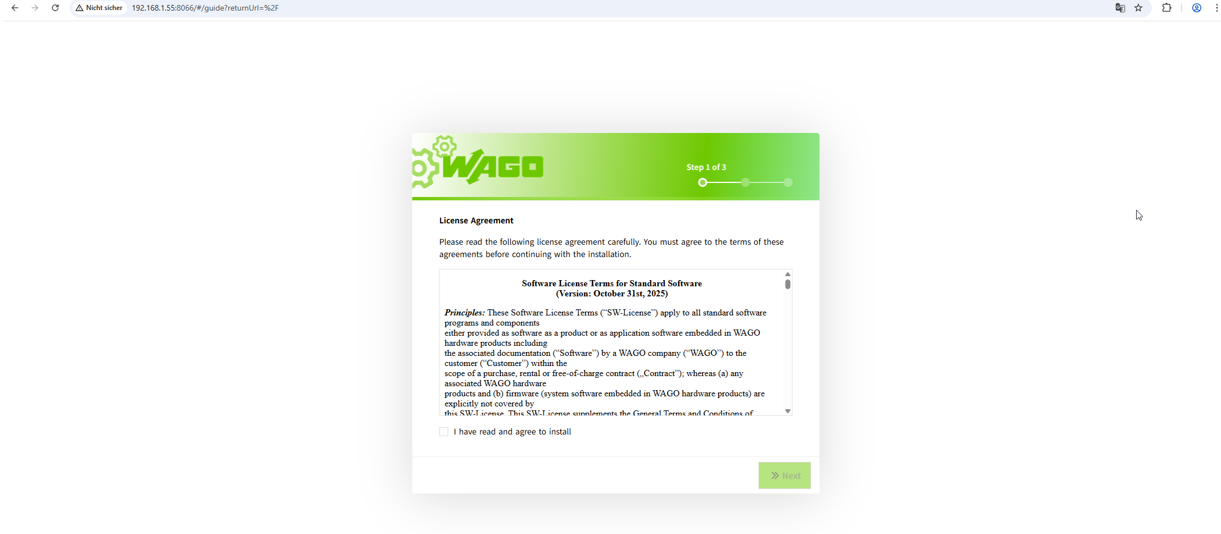
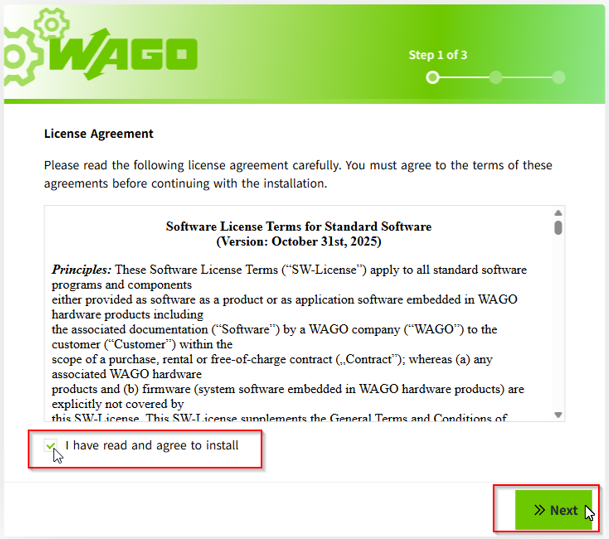
- Accept the License Agreement.
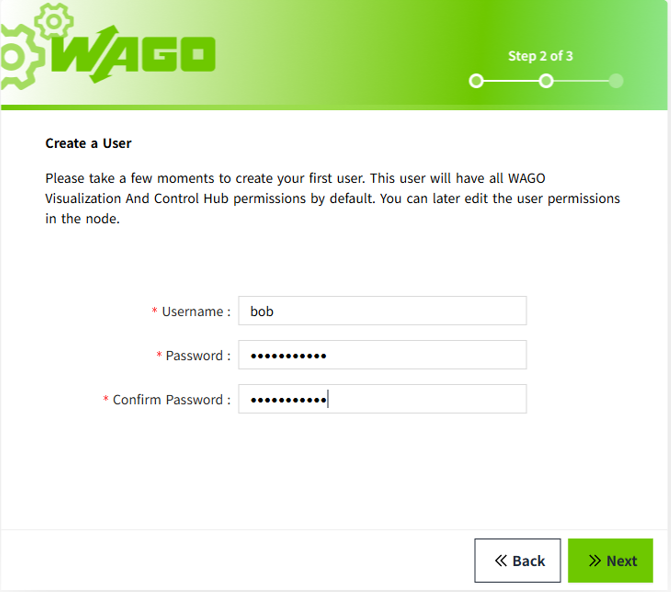
- Setting up the first administrator user
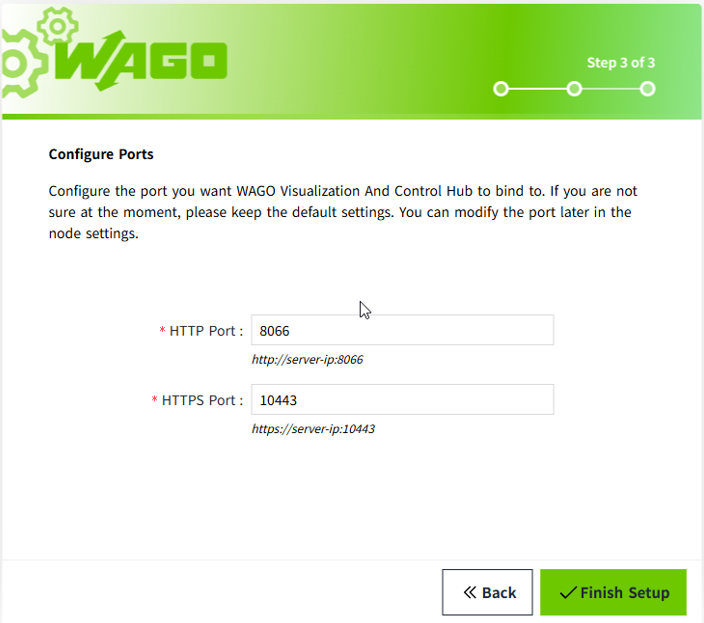
- Port configuration.The VC Hub suggests ports 8066 and 10443 for the web interface.
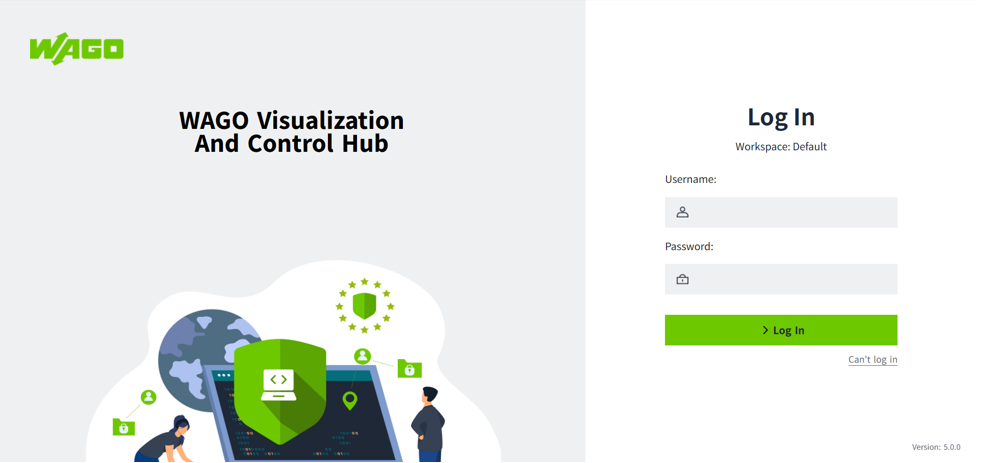
- Now we can log in with the user we created earlier.
Notes:
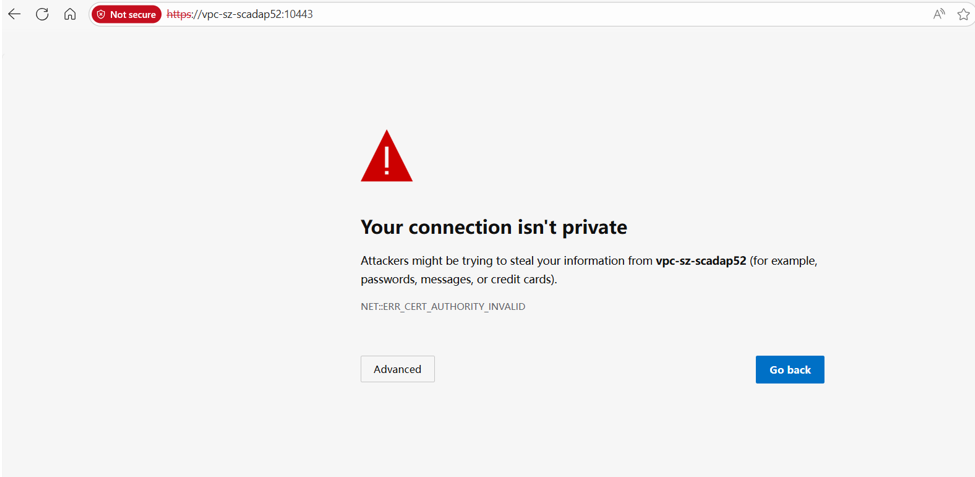
With https, only a self-signed certificate is currently available, which is why a security message appears in the browser. This can be adjusted later. It will not affect the current use of the system.
The IP address is based on the actual deployment address you have chosen. The following image is merely for illustration purposes.
3.3 Firewall Settings
3.3.1 Why the Web Interface Cannot Be Accessed
If the web interface cannot be accessed via the selected port, it is highly likely that the host operating system's firewall is blocking the selected port.
Linux firewall mechanisms are very efficient, but configuring rules and port access requires some experience.
For security reasons, it is strongly recommended to block all incoming connections by default and explicitly allow only the ports that are required.
3.3.2 Linux Firewall Overview (UFW)
Many Linux distributions now deliverd with the so called UFW (Uncomplicated Firewall) tool pre-installed.
UFW simplifies the process of setting up the firewall.
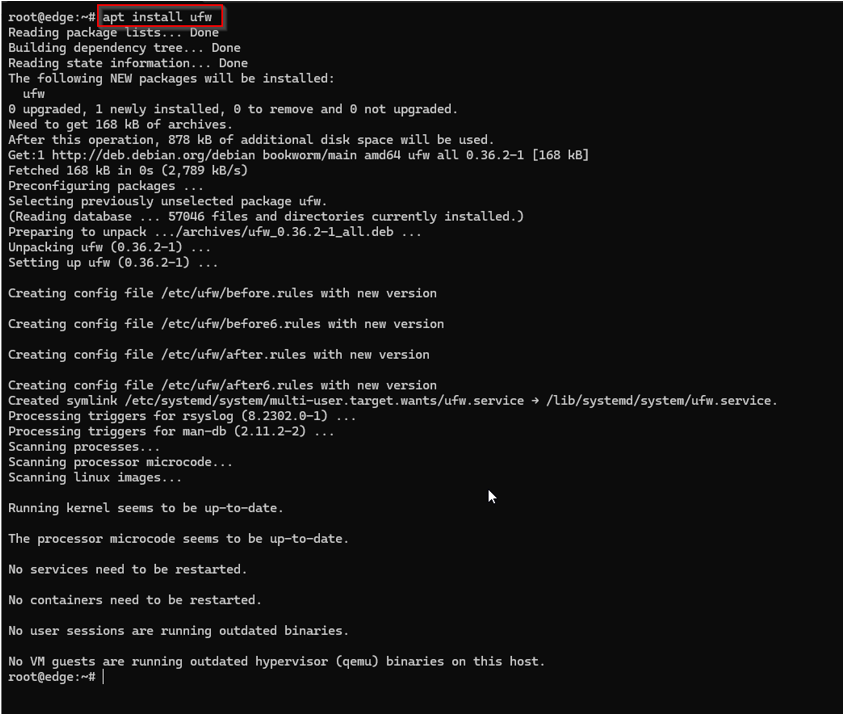
If the tool is not pre-installed, you can easily install it with the command apt install ufw or sudo apt install ufw.
To do this, the server needs an internet connection and the user performing the installation must do so as root or with root privileges.
3.3.3 Configuring the Firewall Using UFW
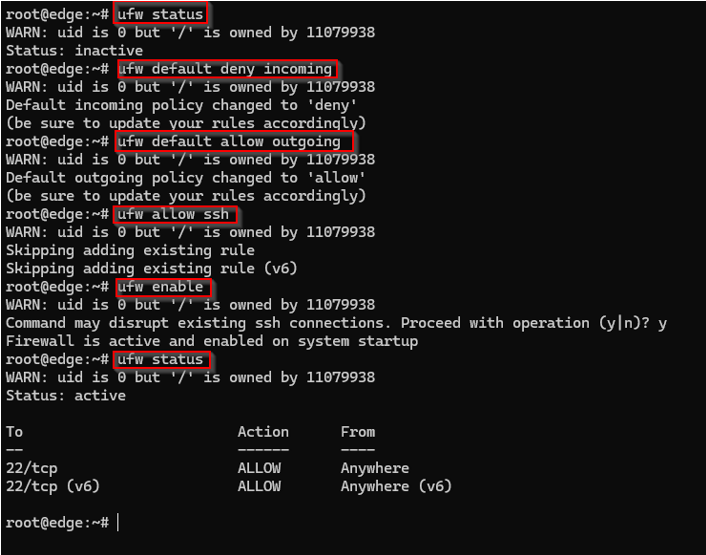
-
Check UFW status. After installation, UFW is typically inactive.
ufw status -
Deny all incoming connections by default. This blocks all inbound traffic unless explicitly allowed.
ufw default deny incoming -
Allow all outgoing connections by default. This ensures the system can initiate outbound connections.
ufw default allow outgoing -
Allow SSH before enabling UFW.
If you are connected via SSH, this step is critical to avoid locking yourself out.
ufw allow sshUFW recognizes standard services like ssh.
Alternatively, you can allow SSH by port number:
ufw allow 22 -
Enable UFW
ufw enableWhen prompted, type y and press Enter to confirm.
-
Verify firewall status and rules
ufw statusYou should now see UFW status as active.
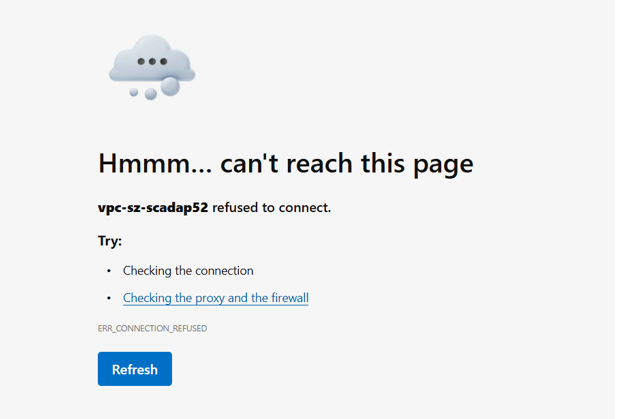
If we have done everything correctly, we can no longer access the web interface of the VC Hub.
You can find very good and detailed instructions on configuring UFW here:
https://www.digitalocean.com/community/tutorials/how-to-set-up-a-firewall-with-ufw-on-debian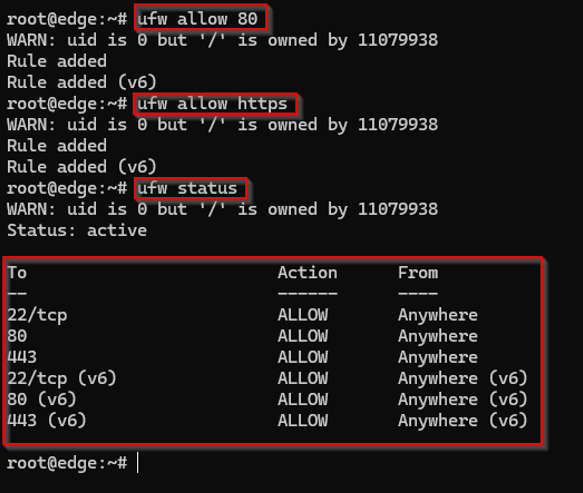
3.3.4 Allowing Web Access Ports
Allow HTTP and HTTPS traffic
Allow http (port 80): ufw allow 80
Allow https (port 443): ufw allow https
After enabling these rules, both HTTP and HTTPS access should work again in the web browser.
Allow Additional Ports (Example)
If you use other services or custom ports, you must allow those ports as well.
For example, you may need to enable port 9090 for the Debian web interface: ufw allow 9090
3.3.5 WAGO Edge Computer Built-in Firewall (Firewalld)
The edge server is equipped with a built-in firewall that restricts access to most network ports.
To ensure proper operation of the VC Hub, you can either
-
Disable the firewall entirely, or
-
Keep the firewall enabled and allow only the required ports
Option 1 : Disable the Firewall (Not Recommended)
Use the following commands to stop and permanently disable the firewall service:
systemctl stop firewalld
systemctl disable firewalld
Note:
-
Disabling the firewall reduces system security.
-
This option is recommended only in trusted or isolated network environments.
Option 2: Open the Required Ports (Recommended)
To keep the firewall enabled and allow only the ports required for VC Hub operation, execute the provided configuration script:
#!/bin/bash
# Open specified ports and make the changes permanent
# Define ports to open
PORTS=(8066 10443 8099 1883 8883)
# Loop through the ports and open each one
for port in "${PORTS[@]}"; do
    echo "Opening port: $port"
    firewall-cmd --permanent --add-port=${port}/tcp
done
# Reload firewalld to apply changes
echo "Reloading firewalld rules..."
firewall-cmd --reload
# Display all open ports
echo "Currently open ports:"
firewall-cmd --list-ports
3.3.6 Firewall Best Practices
-
Block all incoming connections by default
-
Explicitly allow only required ports
-
Regularly review and maintain firewall rules
-
Open additional ports only when expanding VC Hub functionality (e.g., instance communication or MQTT access)
4. VC Hub Structure
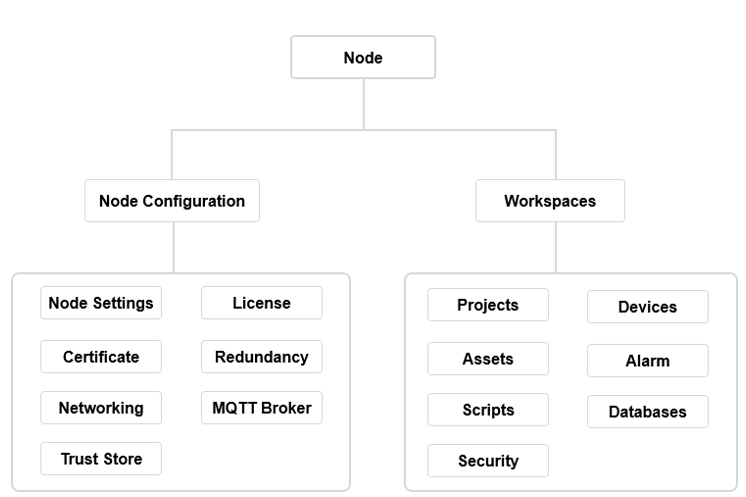
Definition of Terms:
Node: A node is an independent running instance of the VC Hub. Once the VC Hub is installed, it becomes a Node.
Workspace An workspace can be understood as an independent configuration container used to host the complete system configuration for a specific application scenario.It centrally manages configurations such as projects, devices, tags, alarms, scripts, databases, and permissions.Different workspaces are isolated from each other, and only one engineering can be running at a time.
Project: A Project represents a specific application scenario within the system. Each project can contain its own independent set of pages. All projects share the complete configuration of their associated workspace, including assets, devices, database connections, network settings, and other system-level configurations.
Asset: Asset is an abstract representation of a business object or physical object. It typically represents a real-world “object” such as a device, production line, or site. An asset can contain models, instances, and tags.
5. Start working with VC Hub
5.1 Create a Project
Click the "Add" button in the project list to create a project.

5.2 Add a Database
After the installation of VC Hub, a SQLite database will be automatically created, which you can use for basic testing. You can also click "Database" -> "Database Connection" page and then click the "New" button to create a new database connection.
5.3 Add Assets
After the installation of VC Hub, a default asset will be automatically created, which you can use for basic testing. You can also click "Tags" -> "Assets" page and then click the "New" button to create new assets.
5.4 Open the Editor
On the project list page, click the "Design" button for the project.

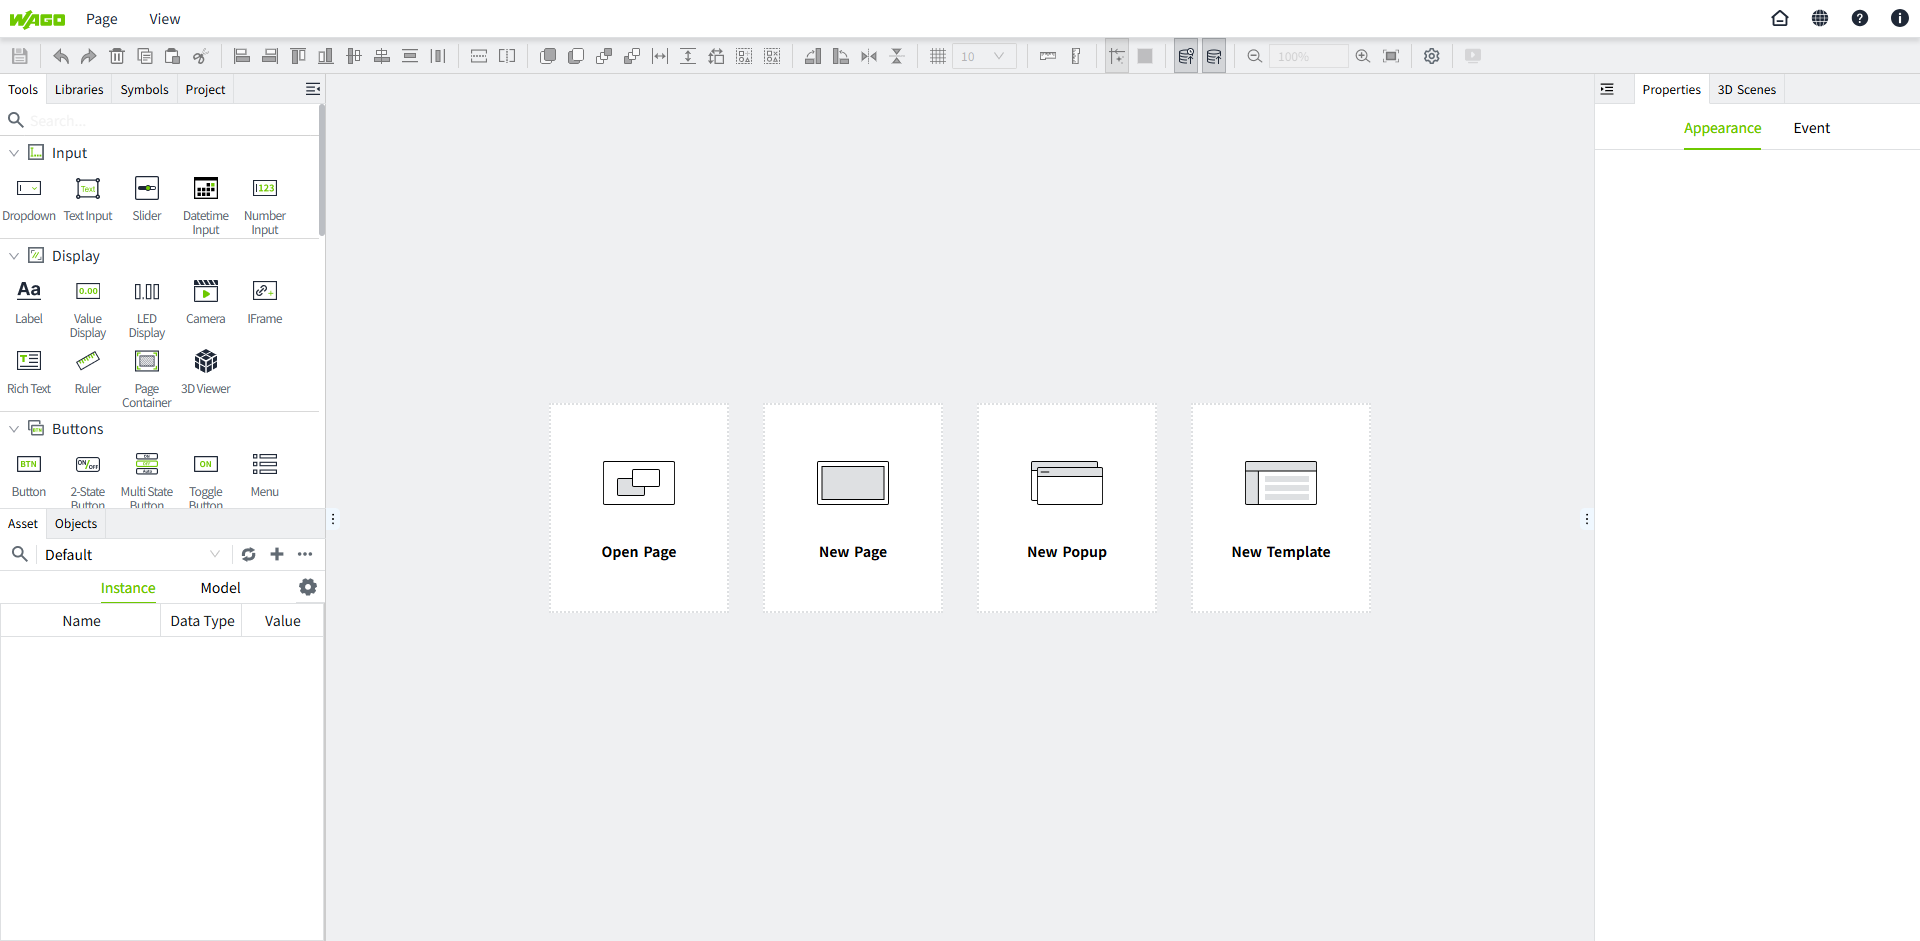
Open the configuration editor to display the following interface.
5.5 Create a New Page
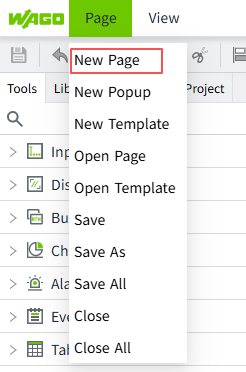
Click "New Page" to quickly create a new page.
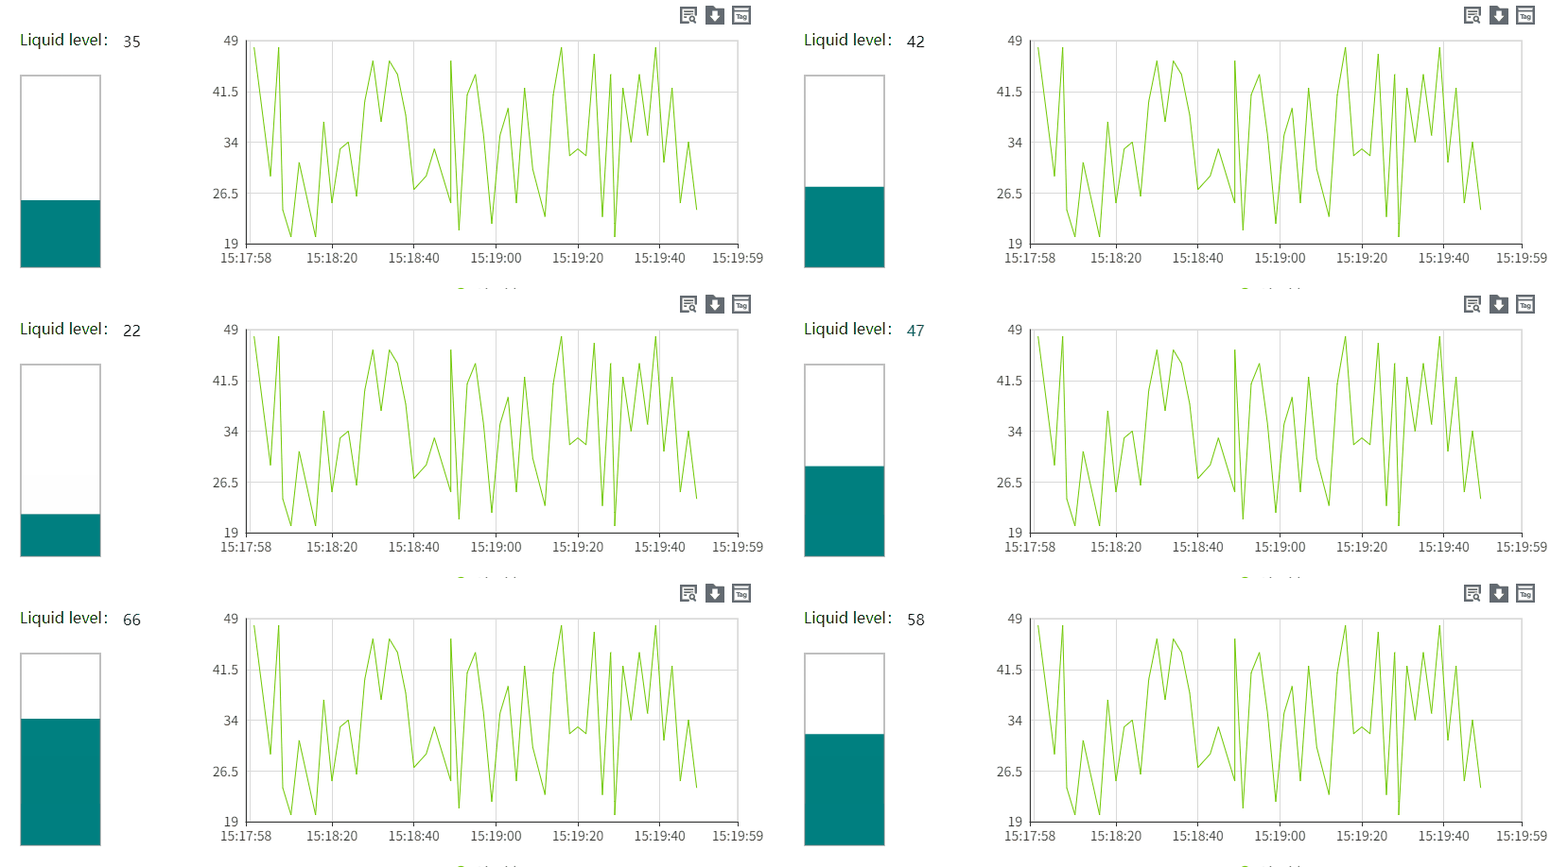
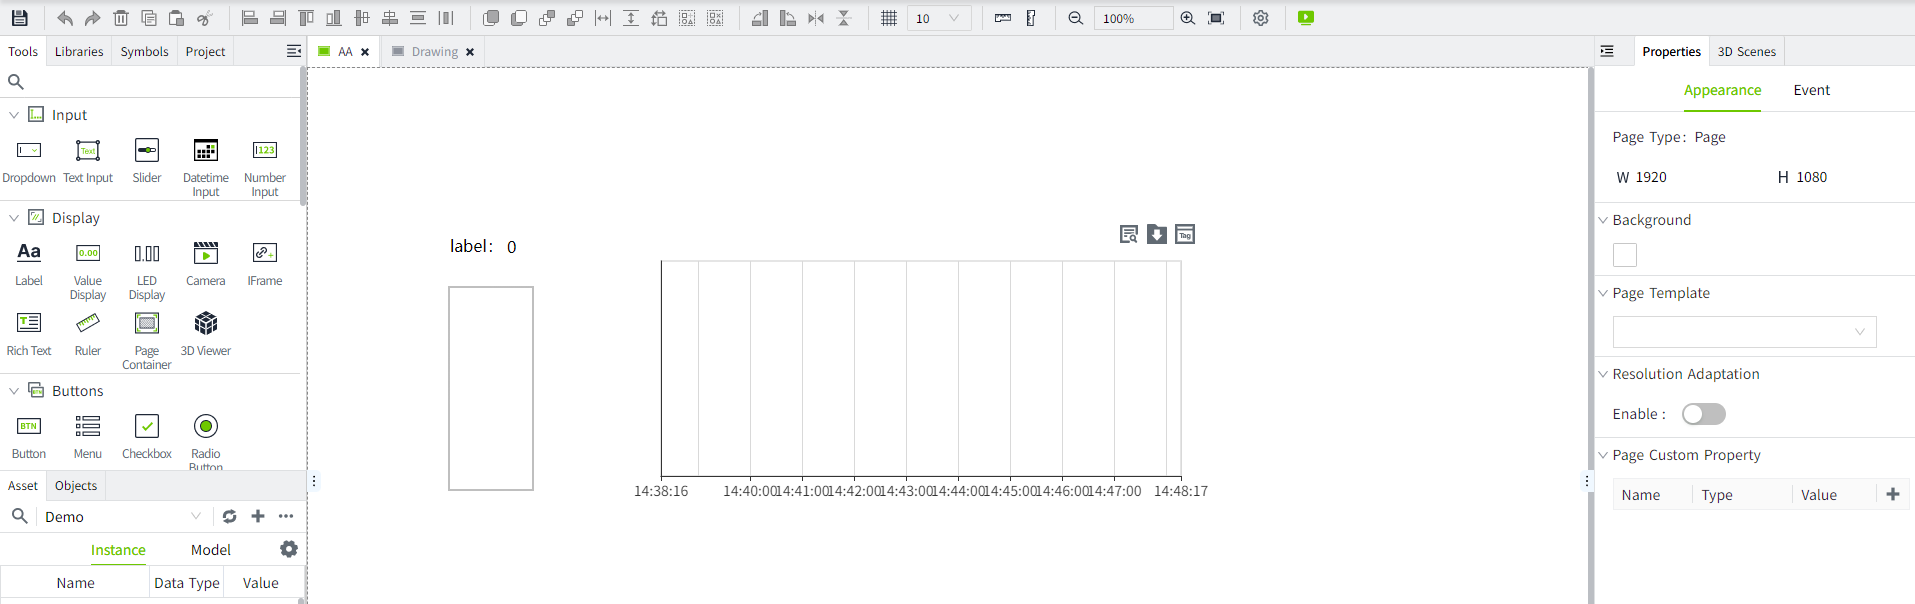
In the Tools window on the left side of the designer, add for example "Rect" , "Label" , "Value Display",and "Historical Trend Chart" controls to the page. You can also use the search functionality.
5.6 Create a Tag
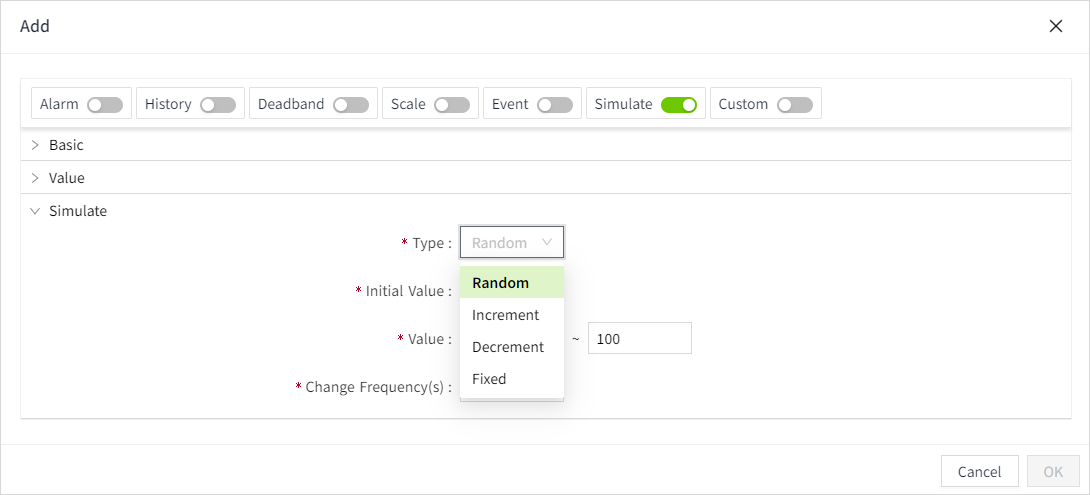
In the asset dropdown box of the asset window in the configuration editor, select an asset and then click the add button to add a memory tag to that asset. Tag name: liquid.
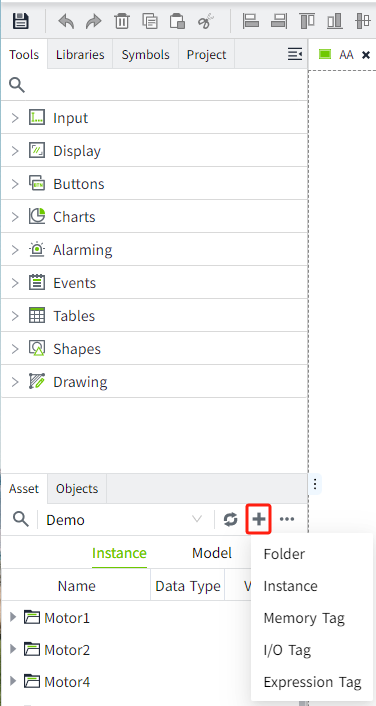
Enable the simulated property for this tag, using simulated value as the tag value. Types supported are Random, Increment, Decrement, and Fixed.
5.7 Enable History for Tags
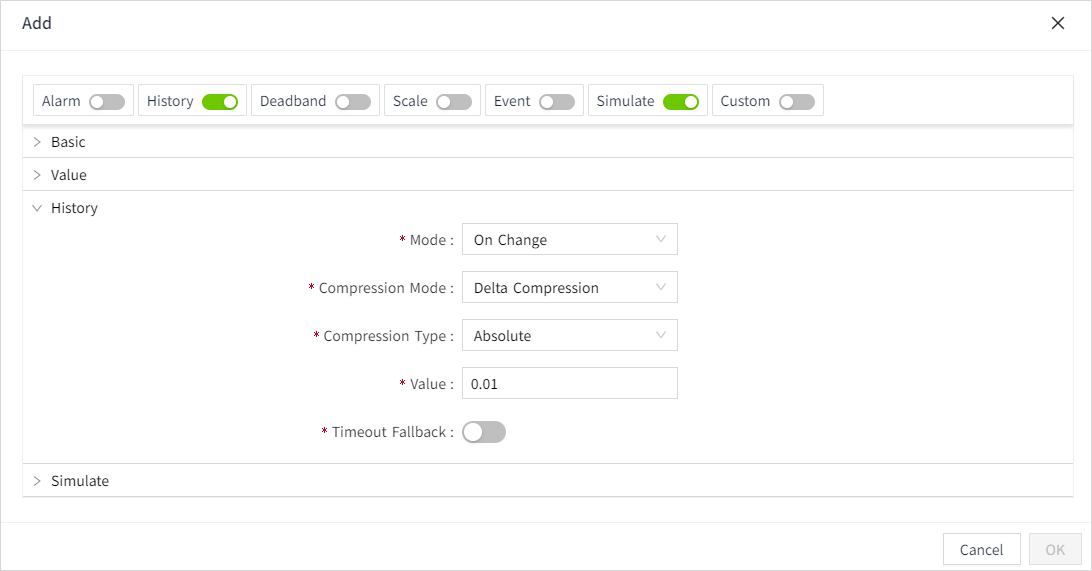
At the top of the tag editing page, enable history to store the value of the tag historically.
5.8 Bind Tag
Bind tags to controls on the page.
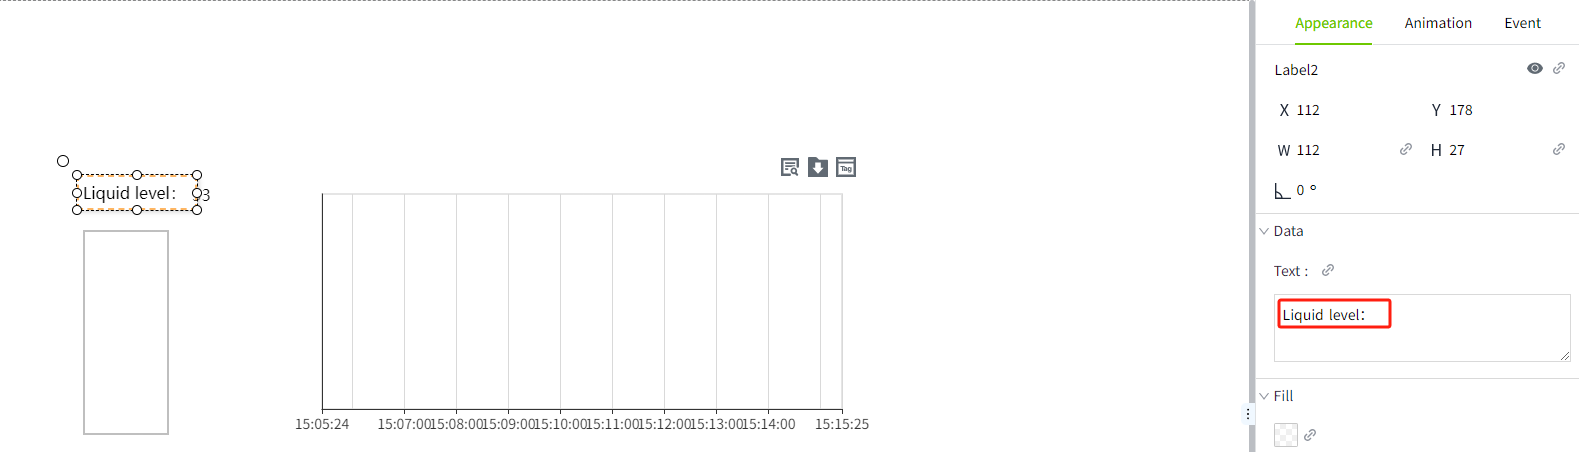
- Set the display content of the text label to: "Liquid level:"
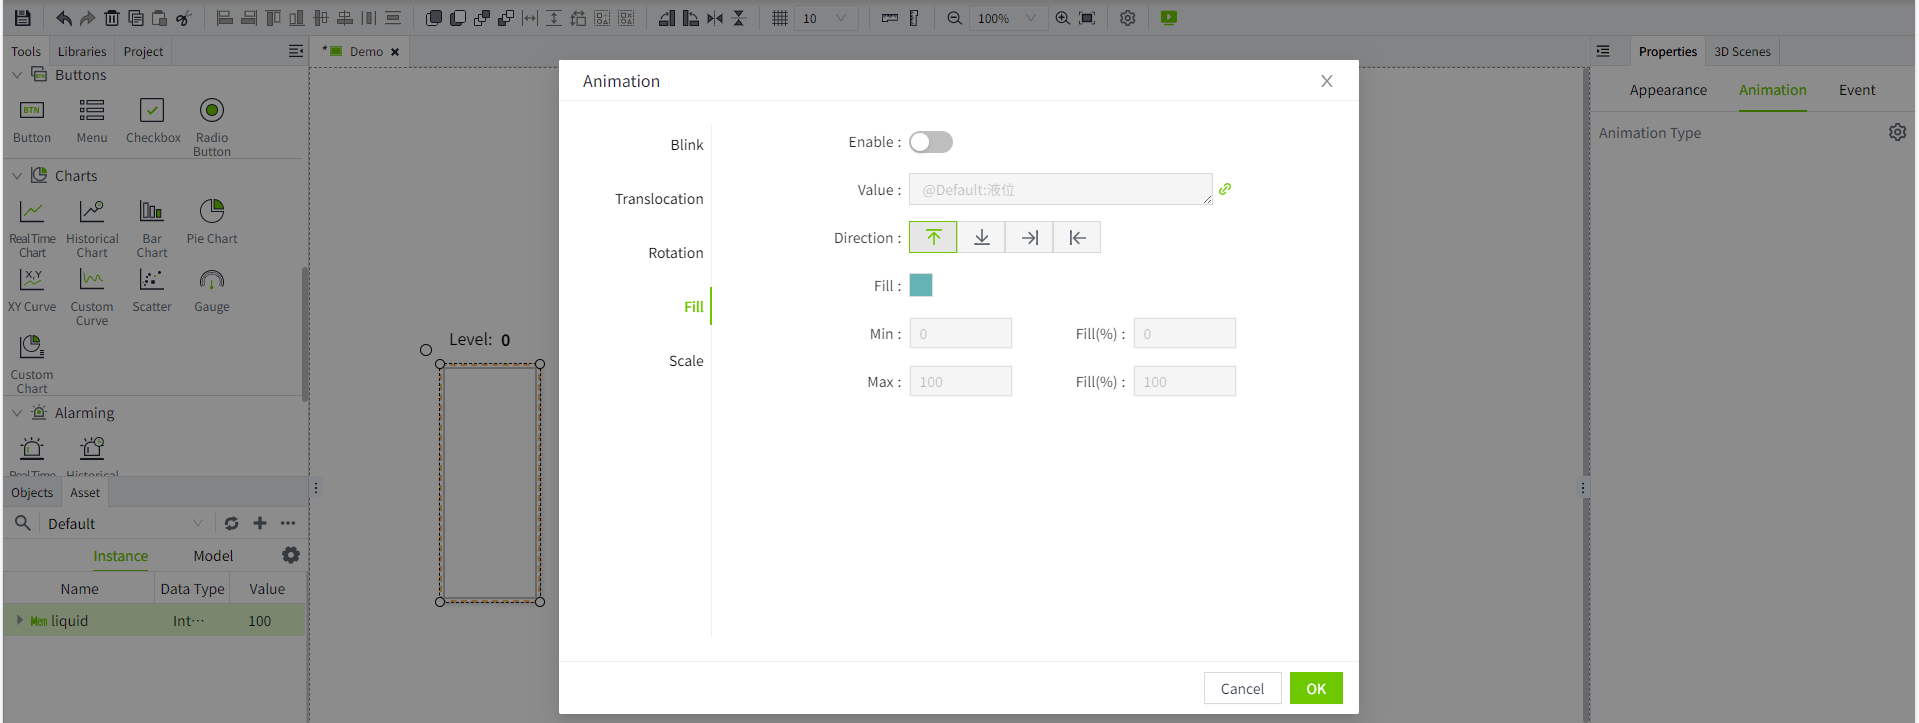
- In the animation of the rectangle, select the fill animation. Click the value binding button and bind the created tag:liquid.
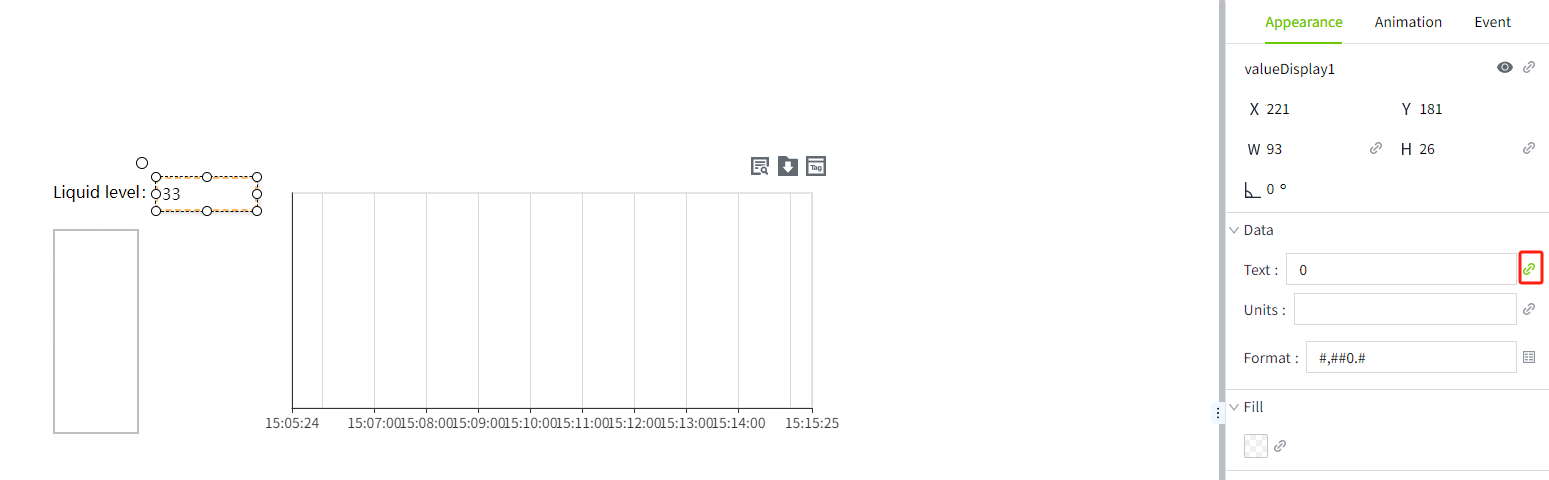
- In the value display control, click the value binding button and bind the created tag:liquid. Afte binding, the binding icon will turn from gray to green.
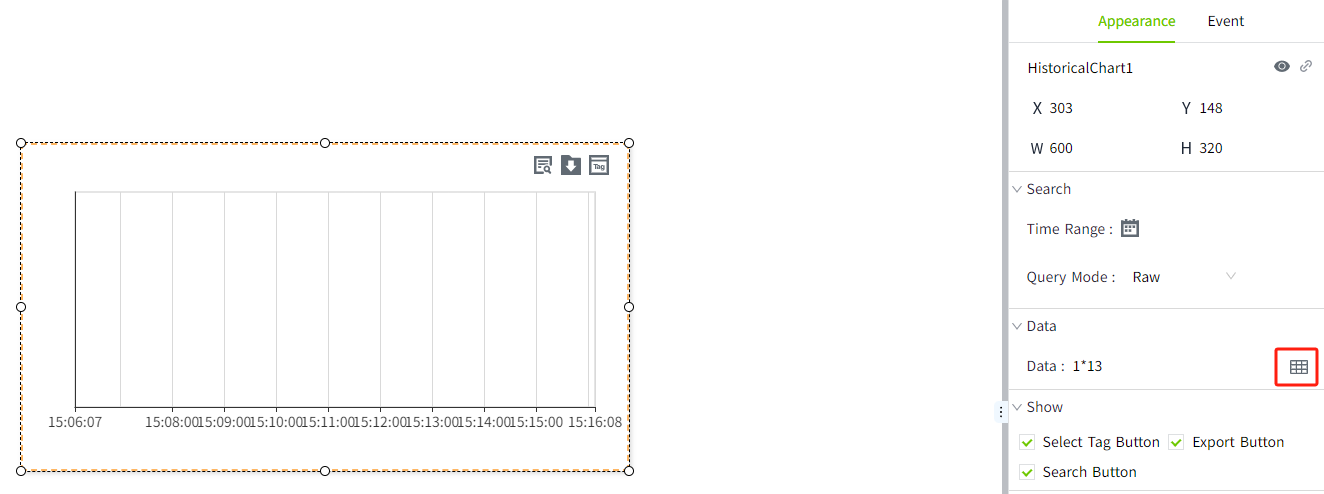
- In the historical chart control, click the value binding button and bind the created tag:liquid.
Note: For more information on binding, please refer to the Property Binding page.
5.9 Preview/Run
Click the preview button in the page tool bar to view the preview effect. You can also click the run button for the project in the project list to view the running page.